
How to Choose a 12-Tray Convection Oven
Choosing a 12-tray convection oven means checking how a taller tray rack fits into your production routine. GLEAN offers a basic side-fan manual model and a rear-fan digital model with six saved programs. Both provide twelve tray positions, but their footprint, tray spacing and controls differ.
This guide compares the two stationary-rack configurations. Start with your products and normal batch size, then check installation depth, operator access and the settings your team needs to repeat. Tray count alone cannot show how comfortably an oven will work in your kitchen.
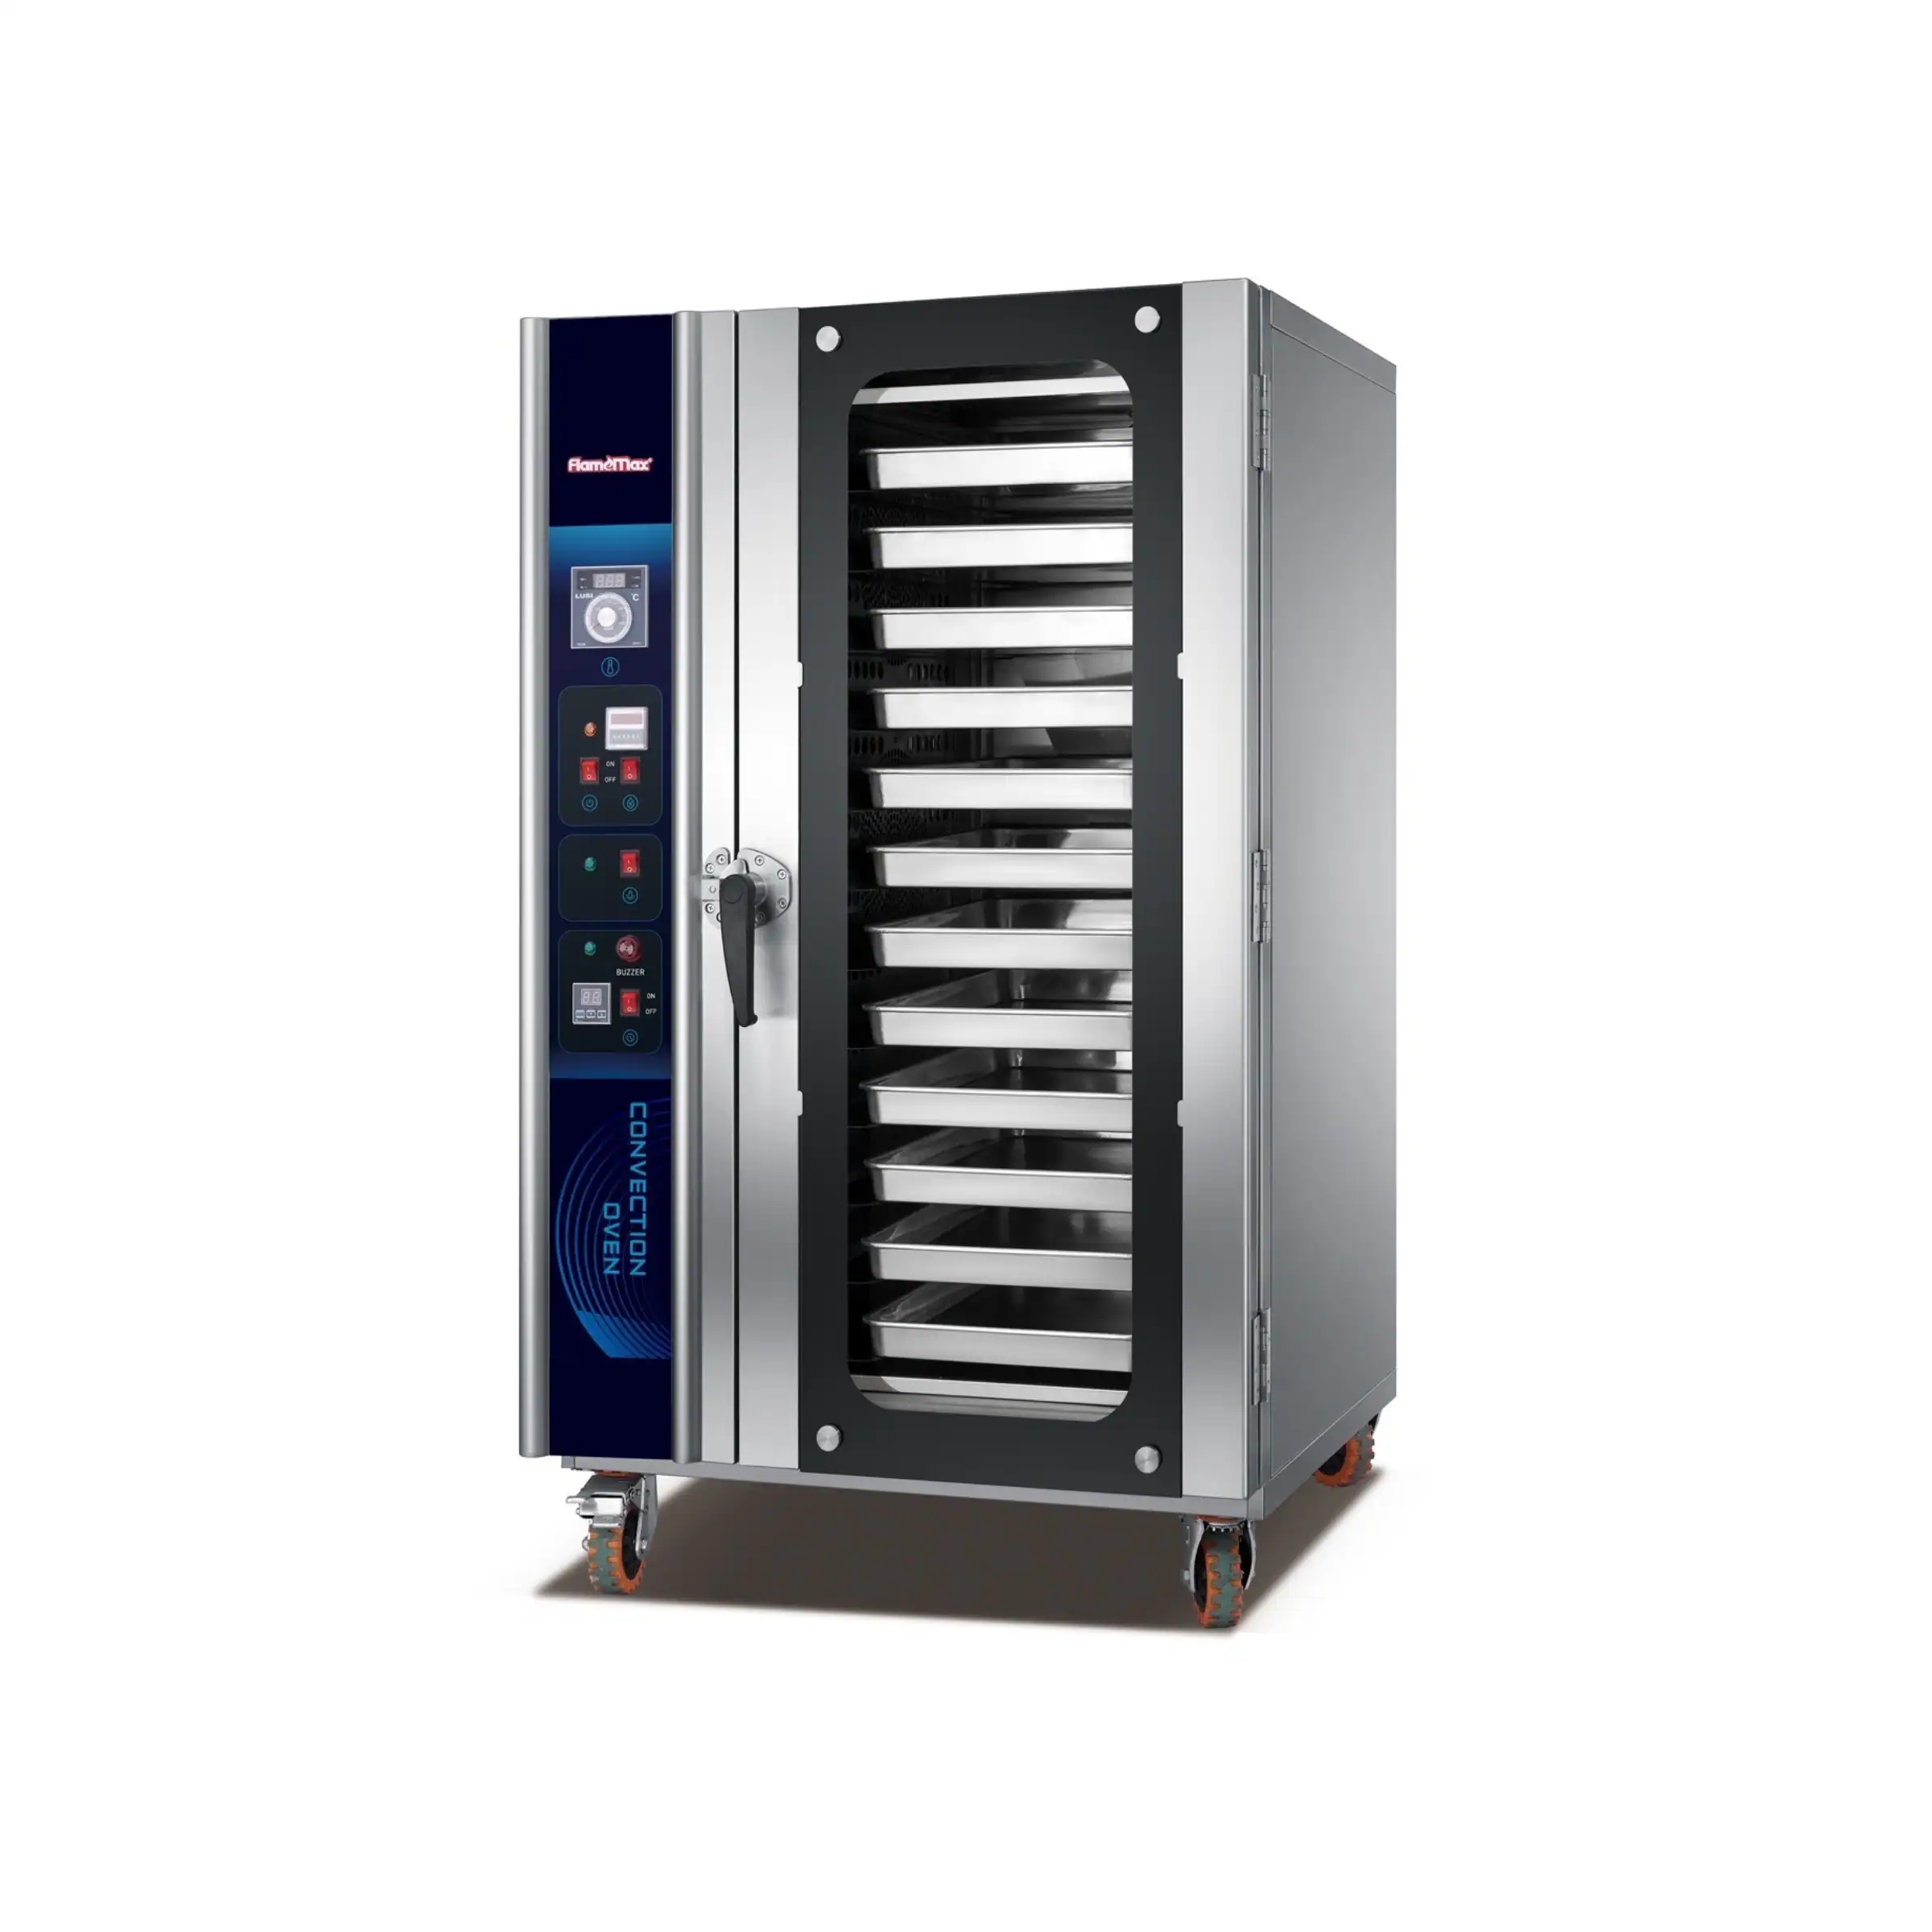
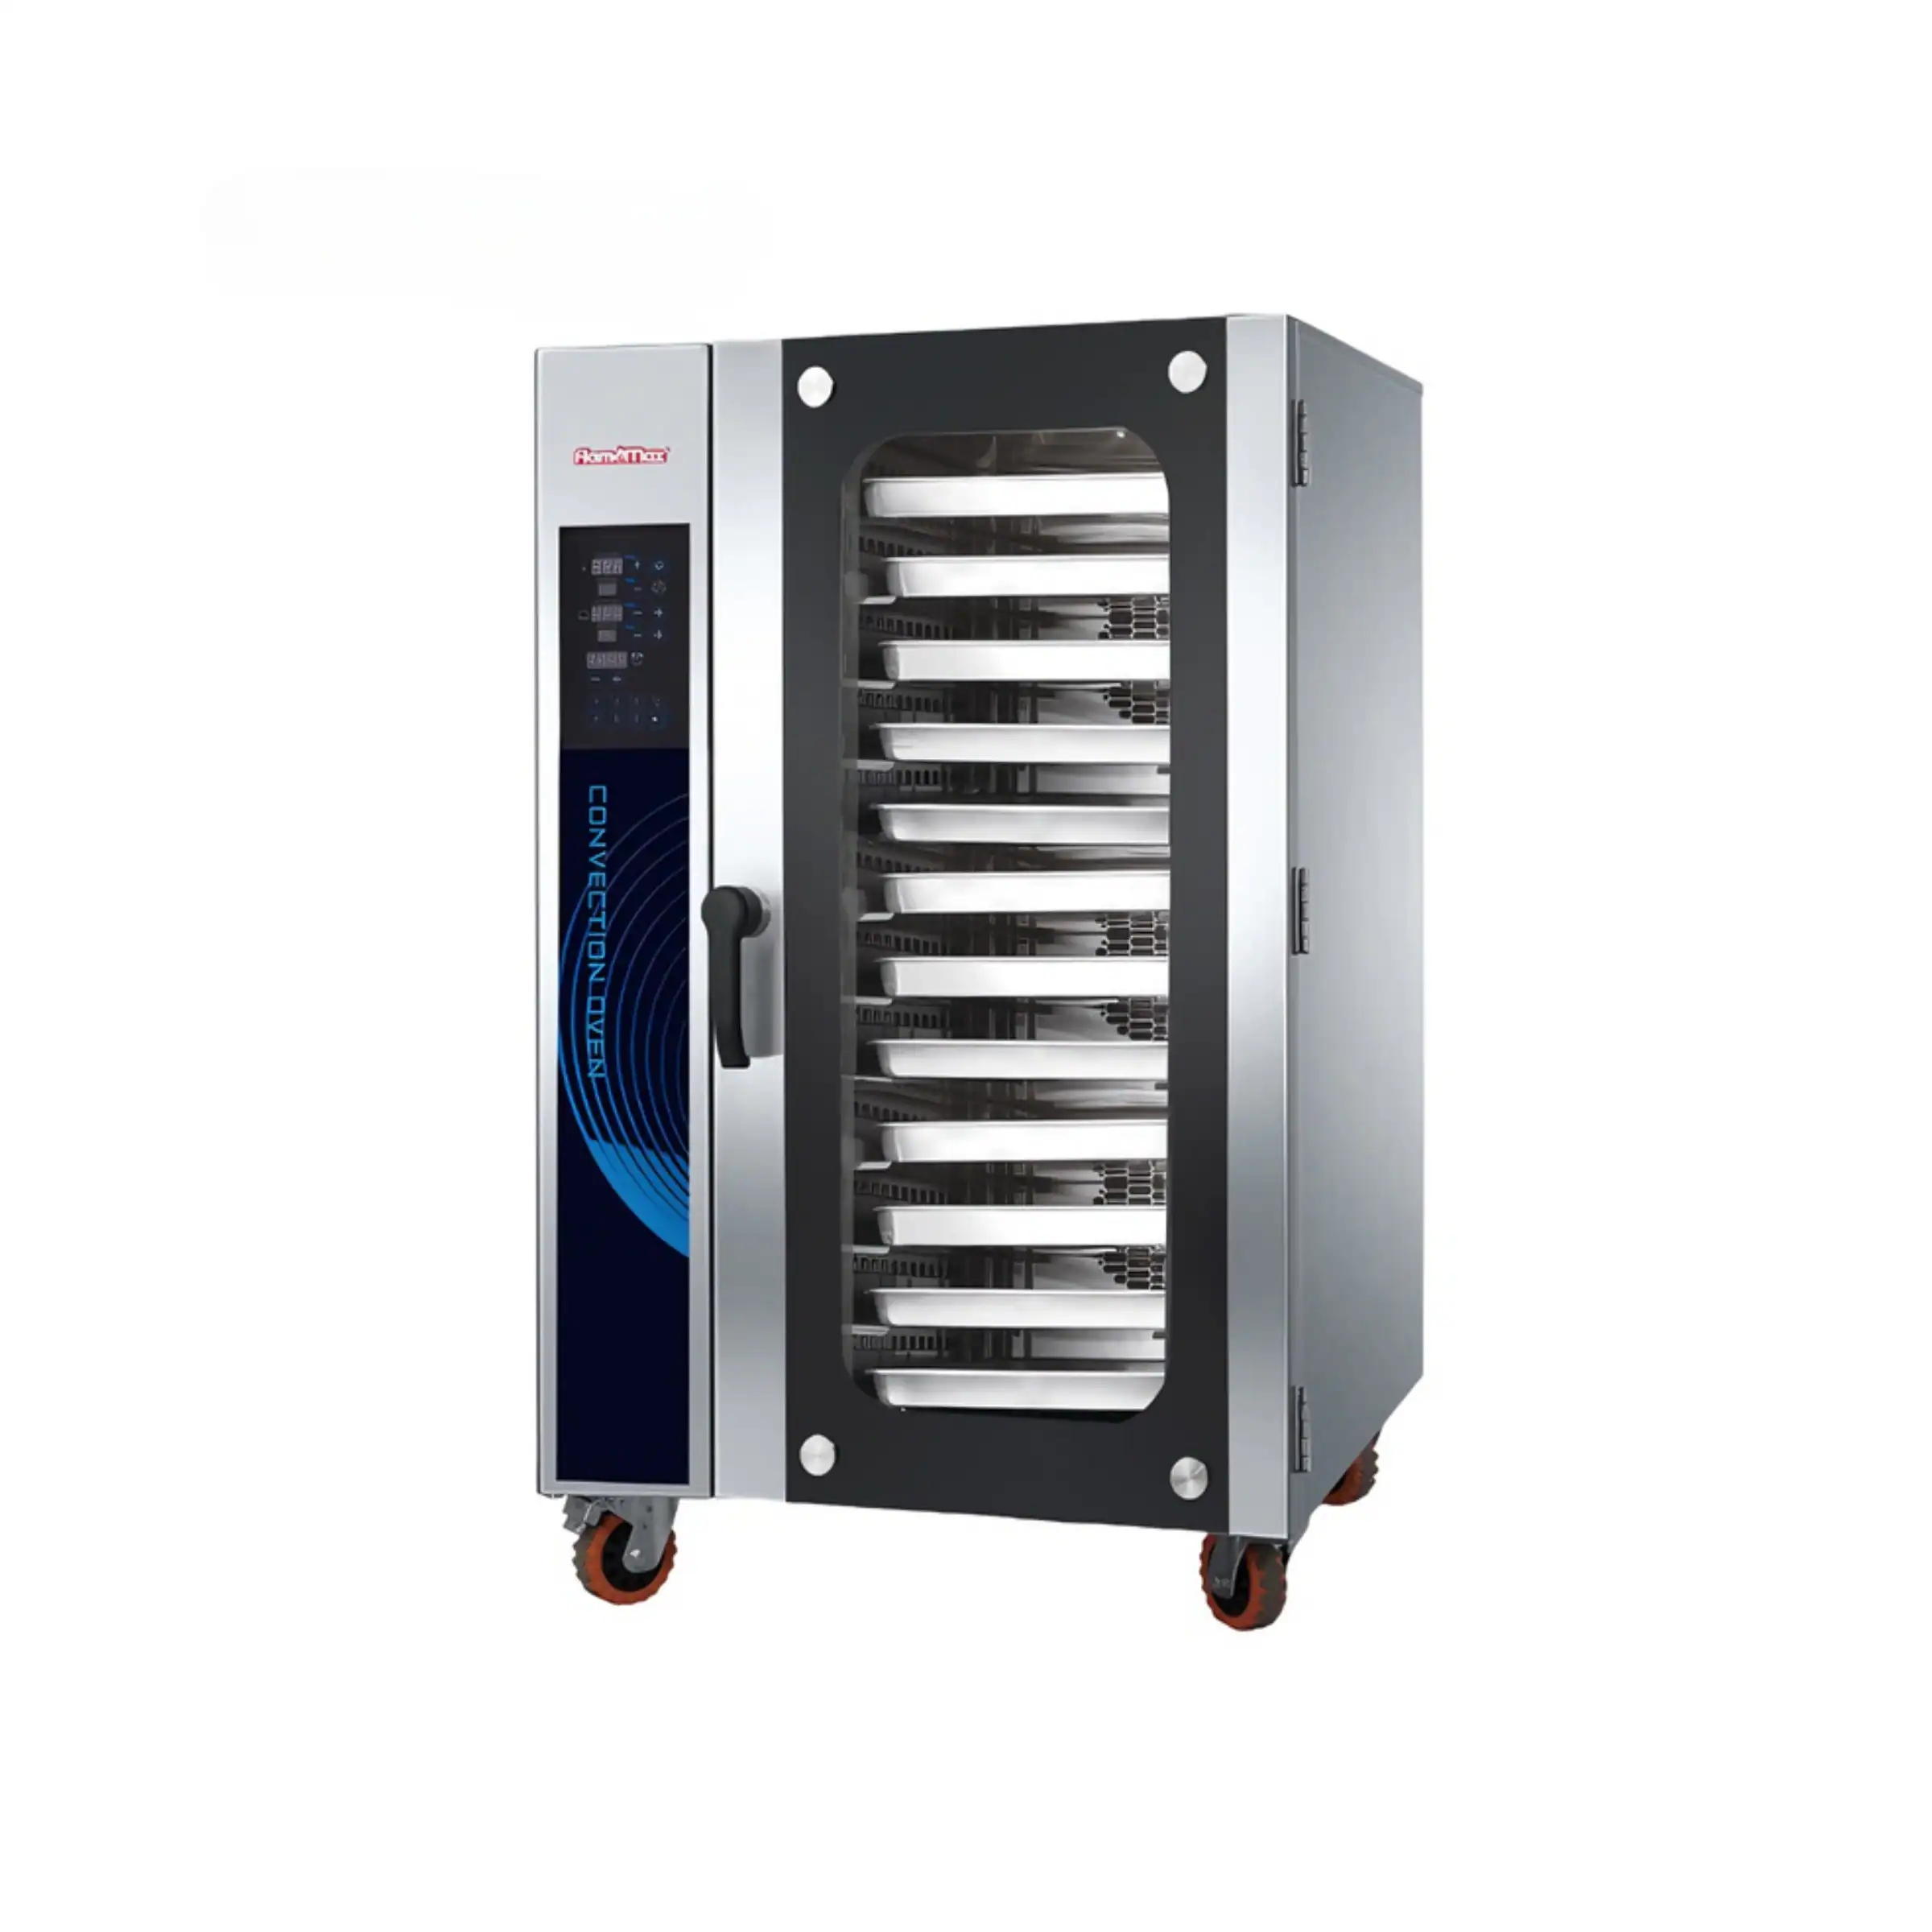
Compare Two 12-Tray Convection Oven Configurations
Both configurations accept twelve 400 × 600 mm trays and are available in electric and gas versions. The internal rack remains stationary during baking. Use the model codes below to distinguish the manual side-fan oven from the programmable rear-fan oven.
|
Configuration |
Electric / gas model |
Rack during baking |
Fan position |
Controls and program storage |
|---|---|---|---|---|
|
HEA-12 / HGA-12 |
Stationary |
Side |
Manual controls; no stored programs |
|
|
HEA-12P / HGA-12P |
Stationary |
Rear |
Digital controls; 6 user-configured programs |
Shortlist the configuration that fits your available space, then compare the control routine. The rear-fan model offers stored programs and wider tray spacing, while the side-fan cabinet is shallower. Neither choice should be made from tray count or fan position alone.
Compare Fan Position and Cabinet Footprint
The basic 12-tray convection oven places the fan beside the baking chamber. The digital model places it at the rear. Both fans reverse direction, while the tray rack remains stationary. Reversing airflow does not mean that the rack rotates.
The side-fan model is 930 mm wide and 890 mm deep. The rear-fan version is narrower at 850 mm, but deeper at 1050 mm. Their listed heights are 1560 mm and 1550 mm respectively. Measure the complete oven position before deciding which footprint works better.
Test a normal batch across the rack levels you intend to use. Check colour, expansion and finish at the upper and lower positions, and confirm that operators can reach those levels comfortably during loading and unloading.
Tall products or deep moulds may require some levels to remain empty. Plan output around the usable loading pattern for your products, rather than assuming all twelve positions will always be occupied.
CONTROL PANEL EXAMPLES
Choose Controls Around the Settings You Repeat
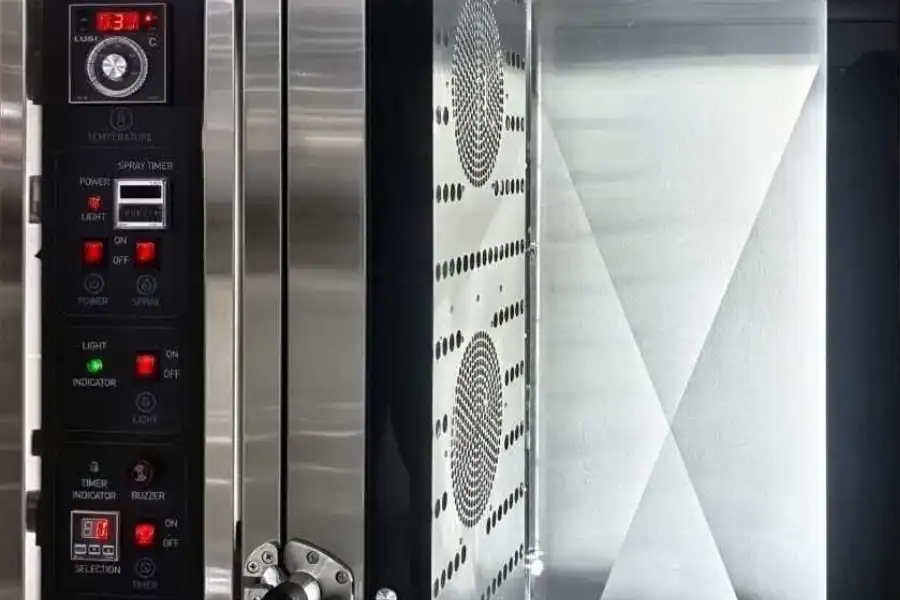
Manual Controls: Set Each Batch Directly
The basic 12-tray convection oven allows direct adjustment of temperature, baking time and spray operation. The panel includes digital readouts, but it does not store programs. Operators set the required conditions for each batch.
Manual controls suit routines with clearly recorded settings. Keep those settings accessible so different operators can prepare the same tray load consistently.
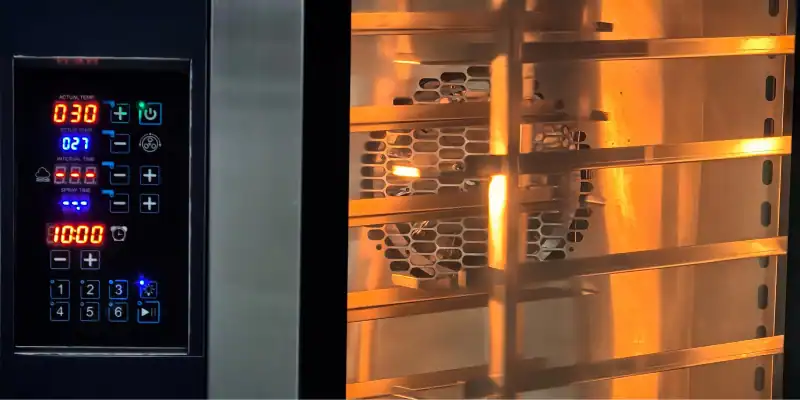
Digital Controls: Recall Six Saved Programs
The rear-fan digital model stores six programs that you configure and test with your products. Recall those settings for repeat batches; they are not factory-installed food recipes.
Allow separate programs where product size or tray loading calls for different settings. Program storage simplifies setup, while usable batch capacity still depends on product height and spacing.
Check Tray Spacing, Installation Space and Utilities
Compare Dimensions Before Finalising the Layout
Both 12-tray convection oven models use 400 × 600 mm trays. The basic version lists 90 mm tray spacing, compared with 100 mm on the rear-fan version. Check these figures alongside product expansion and the tray or mould height.
| Configuration | Oven dimensions: W × D × H | Tray spacing | Rated electric input |
|---|---|---|---|
| Basic manual | 930 × 890 × 1560 mm | 90 mm | 12.5 kW |
| Rear-fan digital | 850 × 1050 × 1550 mm | 100 mm | 15.1 kW |
Tray pitch is the distance between levels, not a maximum finished-product height. Allow for the tray, product expansion and circulating air. Rated input applies to the electric models; actual energy use varies with temperature, loading and the baking cycle.
Measure the Oven Position and Access Route
Measure doorways, turns and the final installation position. Allow the required service and ventilation clearances, plus enough room to open the oven door and handle trays. The cabinet dimensions in the table do not include this working space.
.jpg)
DOOR OPEN AND LOADING ACCESS
Check the Space Needed to Load All Twelve Levels
The open-door view shows the chamber and tray supports of a 12-tray convection oven. Use it to understand the loading arrangement, then check actual door clearance and operator reach against the selected model and your kitchen layout.
Provide a stable landing area for trays before loading and after unloading. Operators should be able to approach the oven, reach the required levels and move hot trays towards cooling without an obstructed route. Include the door swing in that plan.
Both configurations use a stationary removable internal rack, rather than the roll-in trolley arrangement of the 16-tray range. Confirm how the rack is removed for cleaning and keep access practical after installation. Follow the supplied handling and cleaning instructions.
Match the Energy Version to Your Site
The electric models require 380 V, 50 Hz, three-phase power. Compare their rated input in the table with the electrical capacity available at the installation site. Gas versions also need electricity; confirm their separate electrical and gas specifications.
Estimate running costs from your production schedule and local energy prices. Rated electrical input and gas heat input are different specifications, not direct predictions of the cost of a baking shift.
For background on energy used during cooking and while holding temperature, see ENERGY STAR’s explanation of commercial oven energy use. Compare the selected model’s measured performance and your local energy costs before estimating running costs.
A Practical Way to Narrow the Choice
Use the priorities below to shortlist a configuration. Then check the tray loading, installation route and utility requirements together.
| Your priority | Configuration to consider |
|---|---|
| Direct settings and less available installation depth | Basic side-fan manual |
| Saved settings with a narrower but deeper cabinet | Rear-fan digital |
| Rotating trays during baking | Compare another capacity or configuration |
Choose the 12-tray convection oven by matching three things: the footprint you can install, the product height and airflow space you need, and the control routine your team repeats. Compare the benefit of six stored programs with the direct operation of the manual model, then confirm the exact specification.
If your routine calls for a rotating rack, compare the 10-tray convection oven options. For full-trolley loading, see the 16-tray selection guide. Browse the GLEAN convection oven range for all available capacities.